Georeferencing old maps and converting them to WMS
This application allows you to georeference any map published in Zoomify format and convert it to WMS (Web Map Service).
The process consists of two stages:
1. entering the Zoomify URL and checking whether the map is already georeferenced
2. georeferencing the map
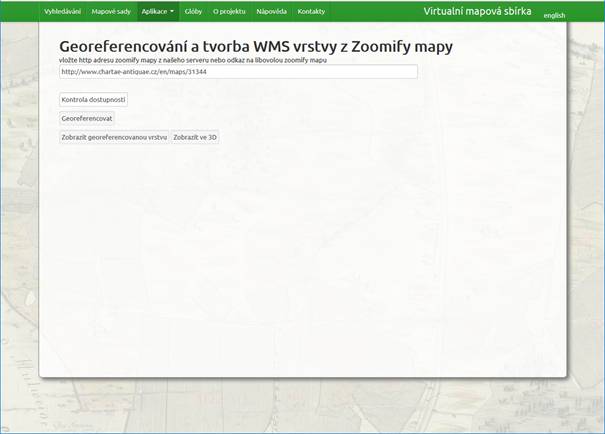
Image 1: Application home page
Entering the Zoomify URL
The application home page contains a form for entering the URL of a map in Zoomify format.
Enter a URL pointing to the map's ImageProperties.xml file (Zoomify's configuration file) into the input field on the application page and push the Check availability button. That will check whether the map exists at the given address and whether it is already georeferenced. If it is, a WMS link will be displayed that you can then use in your own WMS client. Alternatively, you can display the map directly in the map viewer that is part of the Chartae Antiquae website.
If the map is not georeferenced or you want to edit the georeference push the button Georeference.
Georeferencing a map
The georeferencing application allows you to georeference a map from scratch or to edit an existing georeference.
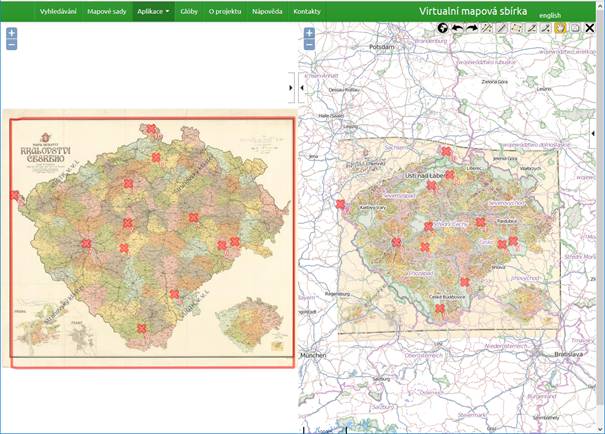
Image 2: Georeferencing application
The application is compatible with recent versions of Firefox and Google Chrome and with Internet Explorer 11+
The left map window displays the original map, the right window shows the current map of the world.
The georeferencing process has two basic steps: defining the map outline and selecting control points.
Recommended georeferencing workflow
1. Define the map outline
Define the map outline by pushing the  icon.
icon.
2. Control point selection
Use  to select control points.
3. Check the results
Check how well the georeferenced map corresponds to the current map; if needed, add more control points.
Controlling the application
Map outline definition
In this step you define the borders of the map drawing. Clicking the icon starts outline definition — place points on the map outline by clicking in the map in the left window. The definition is finalised by a double click. The resulting polygon should not end on its starting point (it will be closed automatically).
The border can be further edited by dragging the vertices, deleting them (hover the mouse over the vertex and press the Delete key) or adding new ones (clicking on the small circles in the middle of the lines connecting existing vertices).
The defined outline is used to calculate an approximate bounding box in the current map (right map window) to simplify orientation for the next step (control point collection).
Clicking the icon starts control point collection.
There are two ways to define control points:
a) Find a control point, click on it in the "old" map (left map window) and then in the current map (right map window). The point will be marked with the same identification number in both maps.
b) When at least 3 control points are defined you can turn on the layer with the transformed "old" map in the right map window. Clicking on the layer will lock the clicked position to the mouse cursor (see Image 3a) and you can drag it to the corresponding point in the current map (Image 3b). Clicking again will create a new control point (Image 3c).
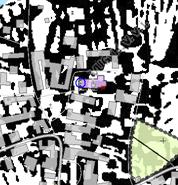
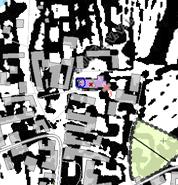
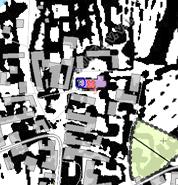
Image 3 a) choosing a control point b) locking the map to cursor and dragging it c) control point creation
After selecting three control points the map will be transformed and displayed on the current world map.
With each new control point the map is automatically re-transformed.
A control point can be deleted by selecting the  icon and clicking the point to be deleted.
 icon allows you to edit control points (change their location).
The  icons let you undo and redo an action.
The  icon displays the whole map. The same effect can be achieved by pressing the A key.

 tools allow measurement of distances and areas.
The  icon between the panels lets you maximize the right map window, which is convenient when creating control points with method b).
arrow maximizes the left map window, which is useful for map outline definition.
icon displays the layer settings. Here the user can change layer visibility, transparency and the order in which they are rendered.
The layer named "Transformed map" shows the "old" map transformed to the current world map, but only when at least 3 control points and the map outline are defined.
The "customized OSM" layer is OpenStreetMap with some colors replaced by transparency for better navigation.
Saving points and map outline
Defined outline and control points can be saved to the server by clicking the  icon. Doing so will close the georeferencing application and display the form for entering a map URL.
Closing without saving
The application can be closed without saving anything by clicking the  icon.
icon.
Useful tips
You can zoom with the mouse wheel (middle button). You can also zoom to a selection by using shift + left mouse button.
Layer description
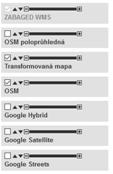
The application has several built-in map layers to facilitate georeferencing:
| ZABAGED WMS | A selection of topographic features in the Czech Republic from the ZABAGED database, provided by the ČÚZK geoportal. Mostly buildings, roads and water. |
| OSM semitransparent | OpenStreetMap with some area types transparent |
| OSM | OpenStreetMap |
| Transformed map | The georeferenced map transformed into the current world map. Available after defining at least 3 control points and the map outline. White areas in the original map are replaced with transparency. |
| Google Hybrid | Google satellite map combined with drawing. |
| Google Satellite | Google satellite map |
| Google Street | Google map |
Note: WMS layers come from external sources and their availability is not guaranteed. Their load speeds can also vary significantly over time.
Send comments, questions and problems with the application to Jan.Havrlant@vugtk.cz